•Example - Changing Appearance of Tables
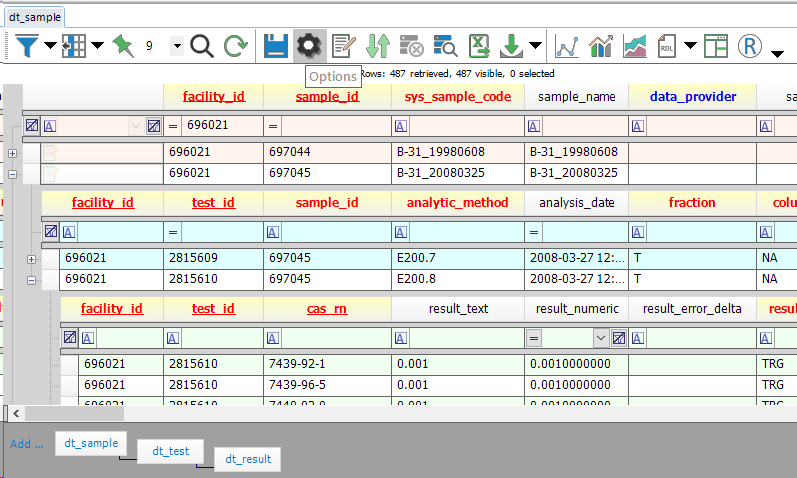
To access Professional Options and modify the appearance of headers and the grid (used for tables, views, and many reports), select the gear icon ![]() in the Grid View Toolbar.
in the Grid View Toolbar.

Figure 1 Options Button and Row Levels
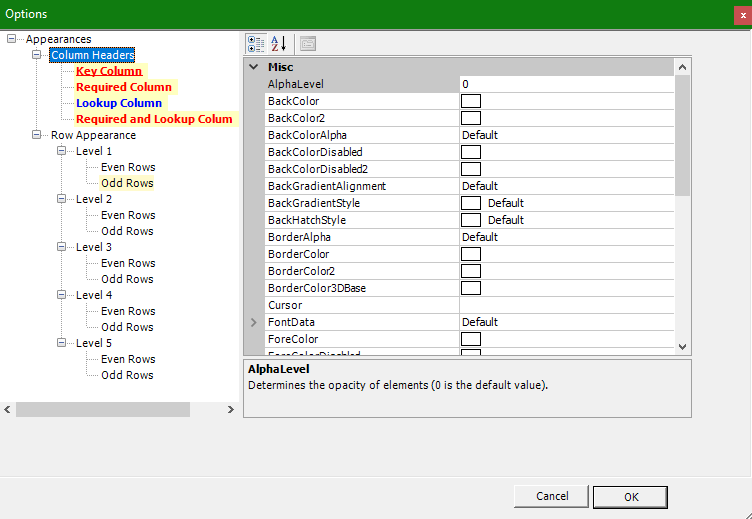
•Column Headers: formatting of columns with specific requirements
•Row Appearance: formatting for each row level of the grid, separated by even and odd rows. Each level refers to further nesting, e.g. of child tables opened within a parent table. Odd row shading for Levels 1, 2, and 3 is shown above in Figure 1.
Figure 2 Options Dialog Window
Pertinent options within the above menus are described below:
•AlphaLevel: determines the opacity of elements (default = 0)
•BackColor...: options for cell backgrounds, including adding a gradient by using both BackColor and BackColor2.
•Border...: options for shading the borders of cells
•Cursor: options for the cursor from a predetermined list
•FontData: options for the text
oBold, Italic, Strikeout: formatting options
oName: specific font (e.g. Arial, Times New Roman). Note that this field is not nullable once created. It can be cleared by:
i.deleting the corresponding settings.xml file in %appdata%\EarthSoft (warning: removes all of the customizations for that item) or
ii.within the corresponding XML file, deleting the Name row, which will appear as something like:
<Name id="ref-6">Arial</Name>
SizeInPoints: font size
•ForeColor: Font Color
•ForeColorDisabled: font color for disabled elements
•ForegroundAlpha: opacity level of text
•Image: options for using images within the grid
•TextHAlign, TextVAlign: horizontal and vertical alignment of text, respectively
•TextTrimming: specifies how text will be rendered when there is not enough room to display the entire string
Along with using the presupplied Custom, Web, and System options, a color can be typed into a Color line (such as BorderColor2 or ForeColor) as R,G,B, e.g. 255,255,255 for White.
Read here for details about how to access EDP display options.
Example - Changing Appearance of Tables
To change the appearance of Key (required) columns in a table (red by default):
1.Click Data Tables ![]() (located in the Open group of the Home tab).
(located in the Open group of the Home tab).
2.Select DT_FACILITY and click Open.
3.Click Options ![]() .
.
4.Expand Appearances and Column Headers.
5.Click Key Column.
6.Scroll down, click ForeColor and change to Dark Green.
7.Click OK.
8.The Key column headers are now dark green.
