•Passing the "Culture" setting to EQuIS Professional via Parameter
•Operating System Language or Regional Format
To use different regional or language settings in EQuIS Windows applications, apply one of the following modifications. For detailed instructions for regional or language settings in EQuIS Enterprise, see Using EQuIS Enterprise with Different Regional Settings or Languages.
Passing the "Culture" setting to EQuIS Professional via Parameter
To run EQuIS Professional from a Command Prompt or Windows > Run, include both the full path for your EQuIS Professional application (typically C:\Program Files\EarthSoft\EQuIS or (for per-user installation) %localappdata%\Programs\EarthSoft\EQuIS\) and the "-culture" parameter, e.g.:
C:\Program Files\EarthSoft\EQuIS\EQuIS.exe -culture DE
Alternately, for EQuIS Professional, a Shortcut can be created instead:
1. Create a shortcut for EQuIS Professional.
2. Right-click on the shortcut and select Properties.
3. Under the Target field of the Shortcut tab, add a "-culture [your culture]" parameter to the end, e.g.:
"C:\Program Files\EarthSoft\EQuIS\EQuIS.exe" -culture pt-BR
The specific culture code required may depend on operating system and can change over time. Refer to this Microsoft documentation and/or consult your IT Department.
Config File AppSetting
Edit the application configuration file, such as EQuIS.exe.config, to add the culture AppSetting. Prior to any modifications, back up the original file.
To explicitly set the culture in the <appSettings> section, add key = "culture" and set the value to the desired culture. The example below sets the culture for English (United Kingdom):
<appSettings>
<add key="culture" value="en-GB" />
</appSettings>
Operating System Language or Regional Format
Without any command line or AppSetting option specified, EQuIS will use the Windows-specified Display Language or Regional Format:
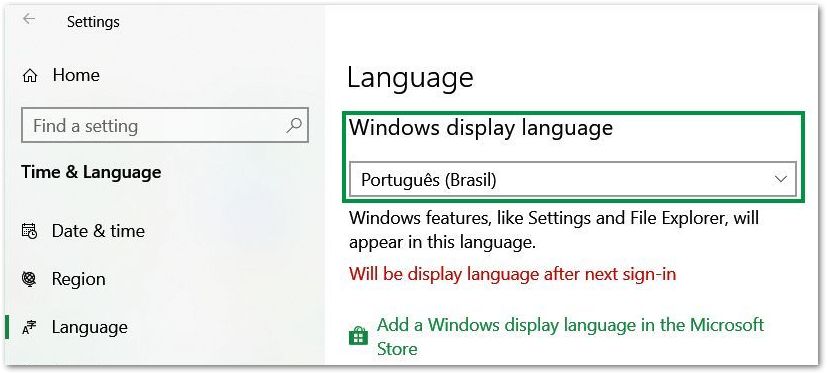
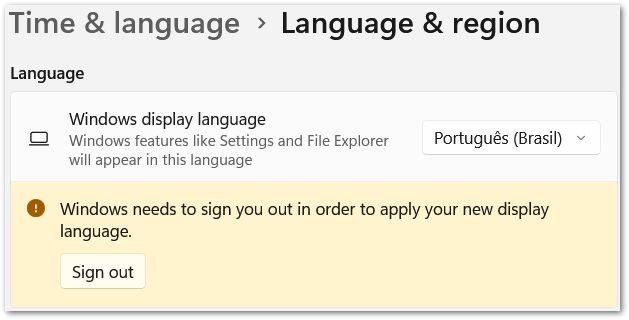
1.In Windows Settings, go to Time & Language > Language.
2.Choose the desired Windows display language.
Windows 10  |
Windows 11  |
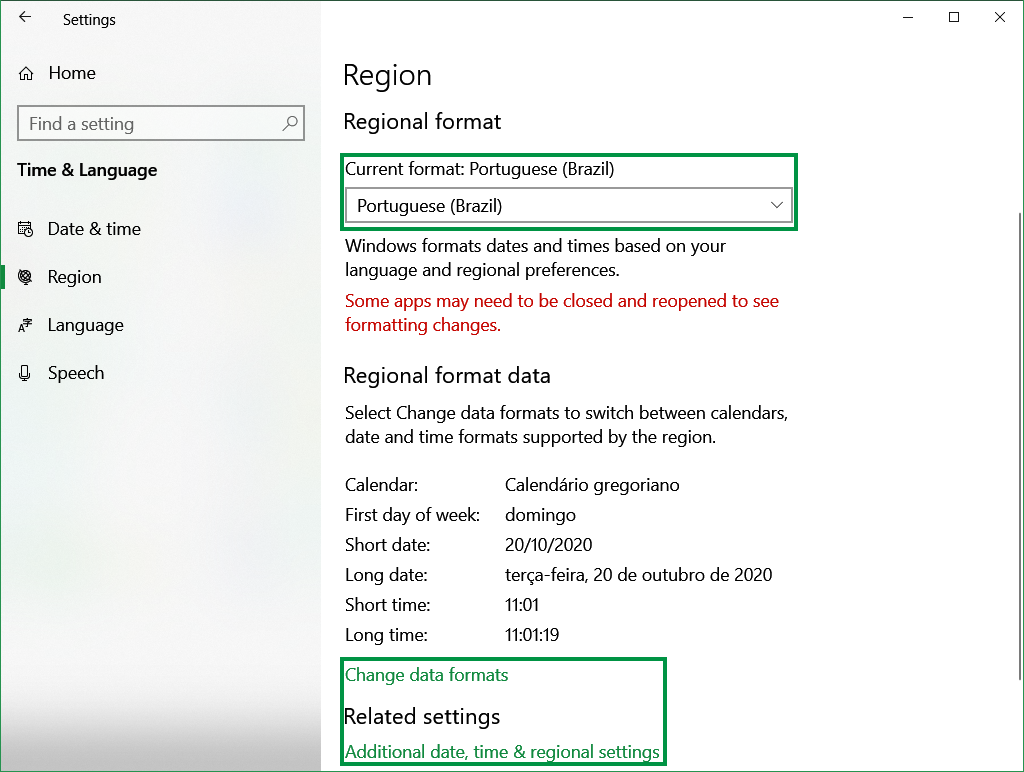
3.Go to Settings > Time & Language > Region (Windows 10 only).
4.Choose the matching Regional format:

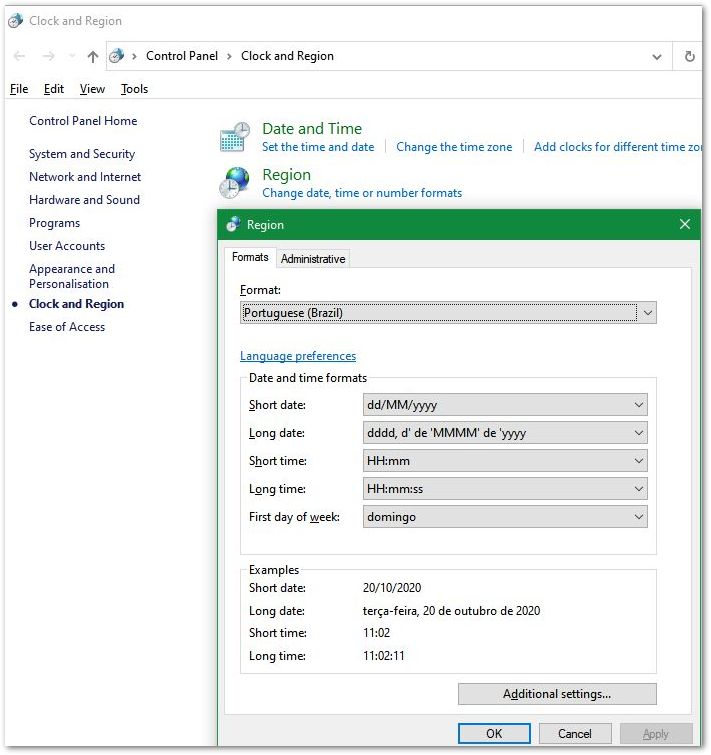
5.Review or edit further format information via the following options:
a.Change data formats (in Windows 10) or Change formats (in Windows 11), or
b.Additional date, time & regional settings (in Windows 10), which links to the Control Panel Clock and Region section. Depending on the view, selecting Region or Change date, time, or number formats in the Control Panel will open the Region window, pictured below. Make changes, then select OK to save.
